Qt Designer Tutorial

In this tutorial, we are going to be creating a tool that creates cubes with custom names… how exciting!! 

While there are various approaches to accomplishing the same task, I would like to share my preferred method – the one I typically employ in production work. It’s important to note that this isn’t the sole option available, and I encourage you to explore different techniques and enhance your skills throughout your journey. This approach has proven effective for me, but there’s always room for learning and improvement.

Maya used to be shipped with a standalone version of qt designer but now it doesn’t anymore… I found this one online that seems to work. 
Disclaimer

Some times the indentations in the Python code get fucked up by the website so keep that in mind when copy-pasting the code. At the end, you should be able to download the full code. 

Initial Setup

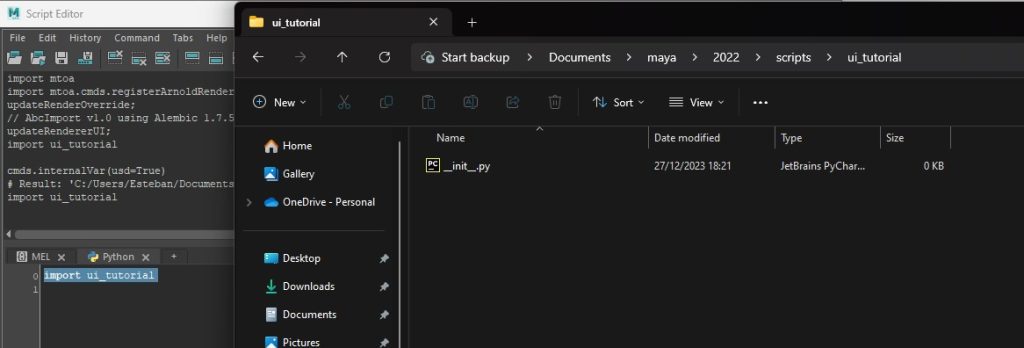
Create a folder in your scripts path:  C:\Users\NAME\Documents\maya\202X\scripts 

And then create a file called __init__.py so we can import that folder into Maya. The file can be empty so don’t worry about it. Just test the import code if you are worried about it. 

				
					# Find the scripts folder.
cmds.internalVar(usd=True)
# Result: 'C:/Users/Esteban/Documents/maya/2022/scripts/' # 


Qt Designer Widget

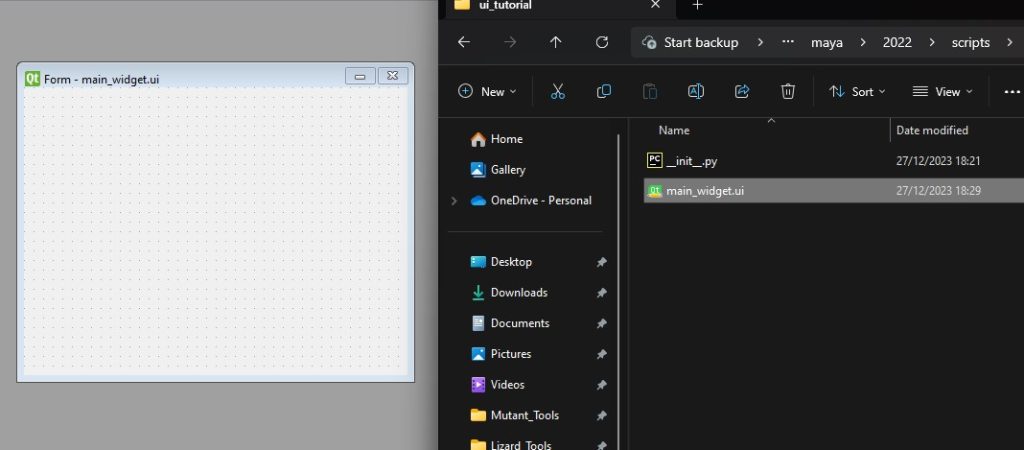
Create a Widget and save it into the same folder. In this tutorial, I’m going to be using the name main_widget but try to be more descriptive with your names in the actual tool you do. 

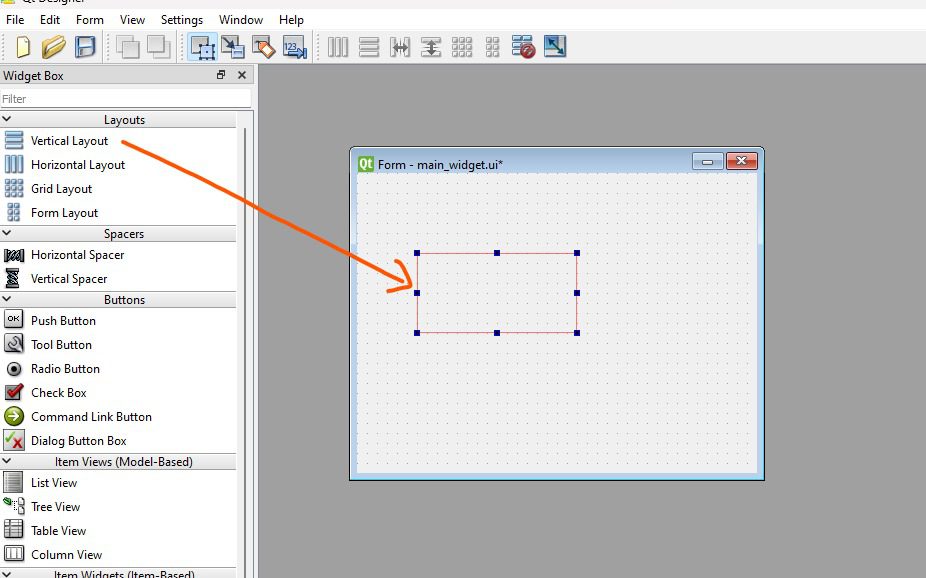
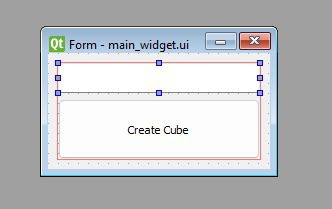
First, create a layout by dragging it into the UI, then click the main widget and lay it out in a grid so it frames and scales with the UI. 

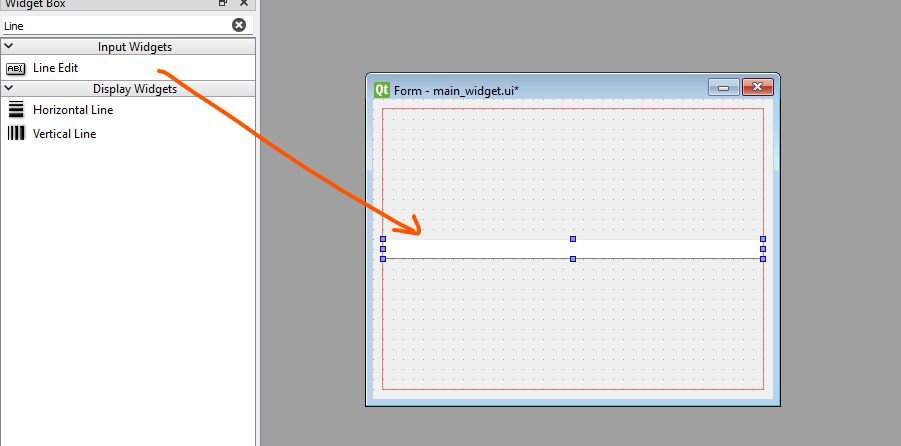
Then we add the line edit and the button. 

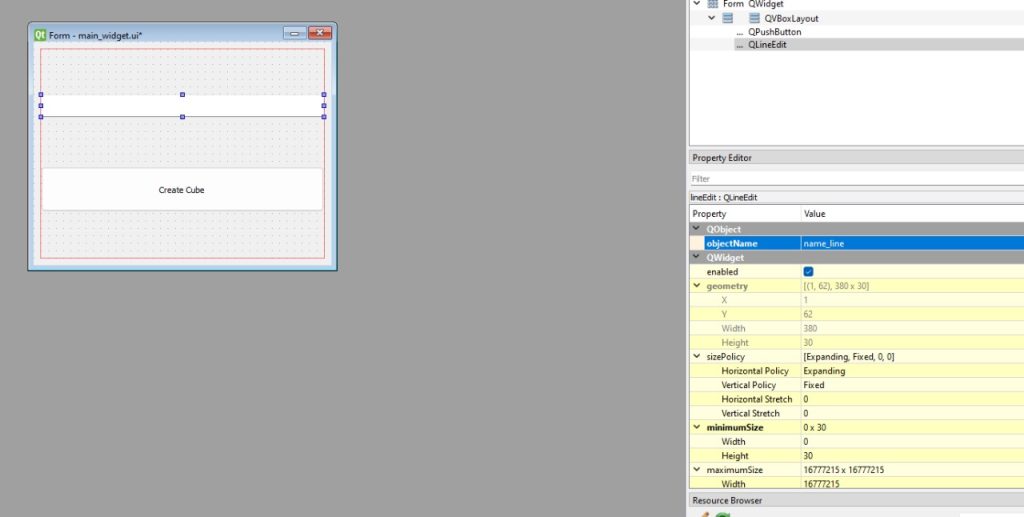
Something pretty boring with complex UI but really important is: naming the widgets. It’s critical since that’s the name we are going to be using to connect to the custom commands. You can also make the buttons a bit bigger since we are getting old and hitting those small tiny little buttons is harder every day. 

Resize it like a normal window and you are ready to go to Maya now! Feel free to add, remove, or change this UI at any time… just remember the names. 

Loading the UI in Maya

This part may be confusing for some beginners, but I’ll do my best to explain it as simply as possible… My goal is that my mother should be able to create her first UI with this tutorial… so if you don’t understand something just feel free to copy-paste the code of each section and ask chat gpt…

Understanding the logic before creating something… I have this preset that I use that I want to explain part by part before adding anything crazy to it. 

The imports that we need explained by google and chat gpt. 

PySide 2 is a set of Python bindings for Qt, a popular cross-platform application development framework. Qt is widely used for developing graphical user interfaces (GUIs) and applications that are intended to be run on multiple platforms, such as Windows, Linux, and macOS. PySide 2 allows Python developers to utilize the features and capabilities of the Qt framework while writing their code in Python.

Shiboken2 is a Python module that provides tools for working with the C++ library of Qt. It is part of the PySide2 package and is used to create Python bindings for Qt.

The os module provides a way of interacting with the operating system, allowing you to perform tasks such as file and directory manipulation, environment variable access, and more.

OpenMayaUI allows us to interact with native Maya API. Allowing us to use Maya as the parent for the UI Widget. 

cmds. is just maya cmds… 


					from PySide2 import QtUiTools, QtWidgets, QtGui, QtCore
from shiboken2 import wrapInstance
import os

import maya.OpenMayaUI as omui
from maya import cmds


We establish these constants at the beginning of the file so we can point to the UI path and set a title for the UI. 

FULL_PATH is just your scripts folder + folder name + ui name but in a good way… please don’t make my mistake and hardcode your paths when you are starting working with code… 


TITLE = 'Tutorial'
UI_FILE = 'main_widget.ui'
FULL_PATH = os.path.join(cmds.internalVar(usd=True), 'ui_tutorial', UI_FILE)


Remember that I mentioned we will use Maya native UI as the parent for our widget? This is the way to get it… We just need to have this function so that when we set a parent for the UI we have one… 

				
					def maya_main_window():
     main_window_ptr = omui.MQtUtil.mainWindow()
     return wrapInstance(int(main_window_ptr), QtWidgets.QWidget)


Using classes may seem hard at the beginning and I think learning them while creating UIs is the simpler way… for now just now a Class is like a function that can hold functions and they all are connected with ‘self’, whatever you see that have self. at the beginning is calling whatever have (self) in the function (class functions are called methods so I’ll continue using the work method for them.)

The class Tutorial_UI has the QtWidgets.QMainWindow as their inheritance. What that means is that it can do whatever the other one can… for now, just now it’s a necessary step for making the UI work. 

The init will have the parent=maya_main_window() function that we mentioned before

We will set the title

For the ones who don’t understand classes: Whenever you run a class it will run whatever is in the init. So in this case it will run init_ui, create_layout, and create_connections which are functions that need to exist. We can create them empty for now. 

				
					class Tutorial_UI(QtWidgets.QMainWindow)
        def __init__(self, parent=maya_main_window()):
            super(Tutorial_UI, self).__init__(parent)
    
            self.setWindowTitle(TITLE)
            
            self.init_ui()
            self.create_layout()
            self.create_connections()


					 def init_ui(self):
        ''


					def create_layout(self):
        ''


					def create_connections(self):
        ''


Loading the UI to Maya!

This is how we load the UI file that we created in Designer into Maya. 

We need to create a loader object based on QUiLoader, and Then we need to create a Qt File… is something you need to get used to but it can only work with qt objects so you need to create them for whatever you need, in this case, is a file but it also happens with icons or anything external. 

Then we qt read the file and we create the self.ui widget with the file data. 

Then we close the file. 

self.ui is the thing we needed! It will allow us to use anything by just typing self.ui.name_line for example. That is why renaming everything was super important in QT design. 

we can say self is the main window and self.ui is the designer widget. 

				
					 def init_ui(self):
        # Load UI file
        loader = QtUiTools.QUiLoader()
        file = QtCore.QFile(FULL_PATH)
        file.open(QtCore.QFile.ReadOnly)
        self.ui = loader.load(file, parentWidget=self)
        file.close()


Testing the Window...

With the init_ui method created and running we should be able to see the UI in Maya, if you are using the script editor you can just run everything with this code at the end to create the UI.

The Ui is a class, so we need to create an object for it. The object is just the same thing but with a custom name instead of self. So object = Class(), then just object.show(), object.close(), etc.

				
					if __name__ == "__main__":
     try:
       cTutorial_UI.close()
       cTutorial_UI.deleteLater()
     except Exception as e:
         print("An error occurred: {}".format(e))

        cTutorial_UI = Tutorial_UI()
        cTutorial_UI.show()


Creating the layout

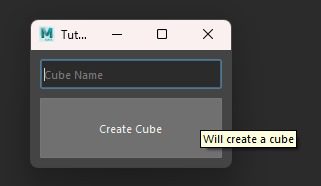
For this UI ill probably won’t add anything to the create layout but to give an example we will add a tooltip and a placeholder text. 

This part will run before creating the connections and I usually use it mostly to add icons and make it more beautiful but feel free to use it for whatever you need! 

Possibilities

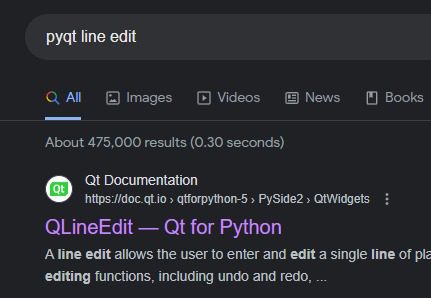
To be able to know what you can do just google pyqt + widget name, the first link will be the documentation for that specific widget… there is a lot but everything is pretty explicit and you will understand it fast enough

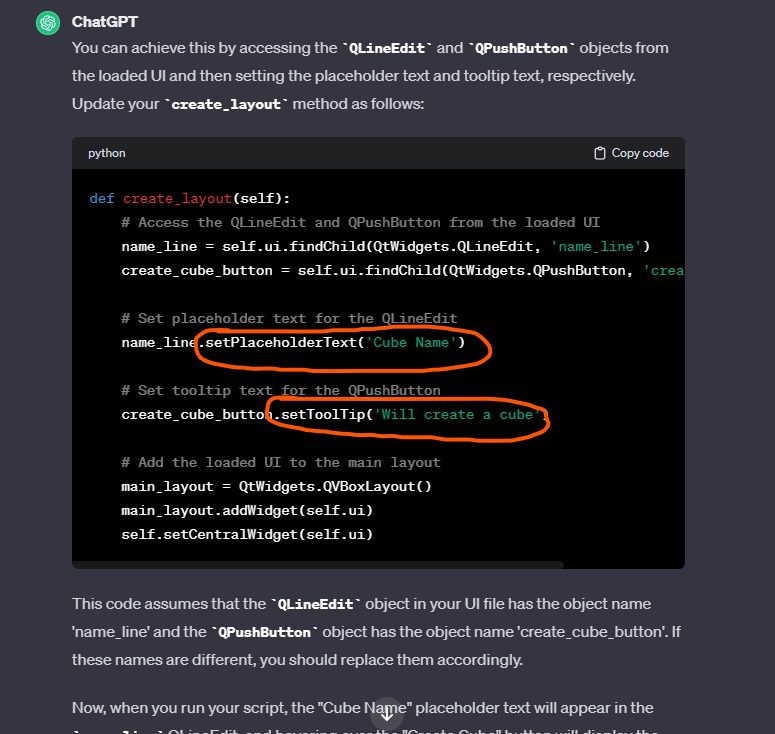
Keeping up with technologies you can also use chat gpt and to be fare i don’t really recommend it for beginners but i use it a lot for the stuff i tent to forget like this examples:

Tooltip and Placeholder text

We can see that the chat gave us a lot of crap code that we don’t need and thats why I don’t recommend it for beginners. We only need the cirle parts of the code. 

We will just use self.ui to create the desire result instead of finding the widgets. 


self.ui.name_line.setPlaceholderText(‘Cube Name’) will work for the line edit and self.ui.create_cube_button.setToolTip(‘Will create a cube’) for the button. 

				
					def create_layout(self):
        self.ui.name_line.setPlaceholderText('Cube Name')
        self.ui.create_cube_button.setToolTip('Will create a cube')


Making the create cube function

We will create a new method on the class, again just like creating a function inside but with self so we can use it as part of the UI. 

				
					def create_cube(self):
        name_text = self.ui.name_line.text()
        cube = cmds.polyCube(name=name_text)
        return cube


Pretty simple… we just need to grab the name and this is the way. we just call the self.ui > name_line > text().. We are just asking for the text on it and that is it! 

Conecting the button

				
					def create_connections(self):
        self.ui.create_cube_button.clicked.connect(self.create_cube)


Connecting the button is pretty straightforward also. 

self.ui > create_cube_button > clicked > connect > (self.create_cube)
We grab the ui, we find the button, and we tell the button that whenever get clicks it does something, in this case, create the cube.