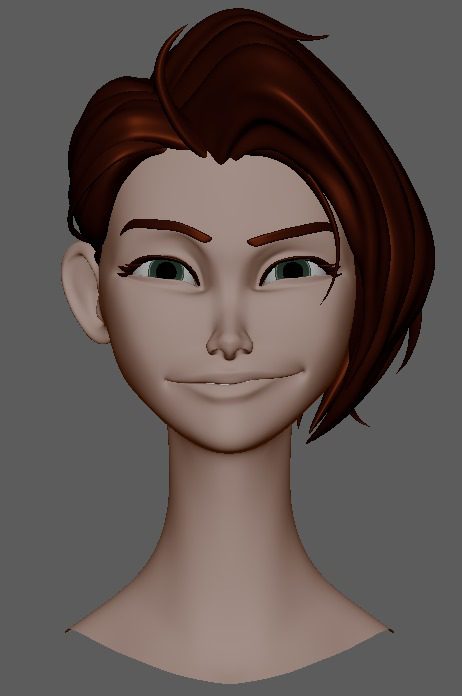
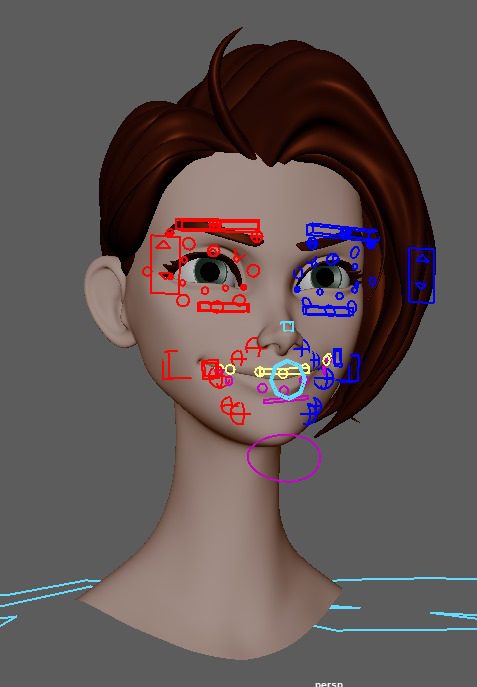
Face Rig
Model: Boonie by Makar Malicki
The rig will be made using my scripts: Mutant Tools
Skinning Tools: ngSkinTools
Blendshapes Tools: SHAPES

Understanding the logic!
Is pretty simple, we rig the face in layers so we can have a lot of custom systems that work together. The face rig is done independently from the body and later combined for an easy and clean setup. We divide the main head into 2 parts: The lower and Upper Skull, these 2 are in a local system together and then each system has a local rig attached to the skull system. Each part depending on where is located will get parented to either the upper or lower part of the skull.
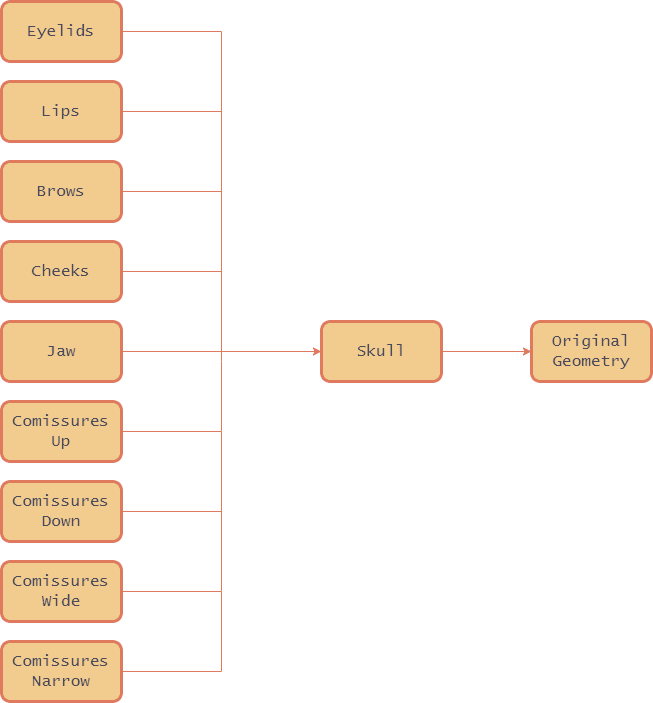

Always keep in mind the muscles, where do they start? where do they finish? They are links so if you move one which one is going to move with? THEY HAVE VOLUME! So keep the volume! Also, remember that the Skull is a solid object, you can’t move the skin through it but around it!
Placing the guides
We will be using the Human Template that will import us a set of ready to use blocks! Ill explain the blocks, one by one.
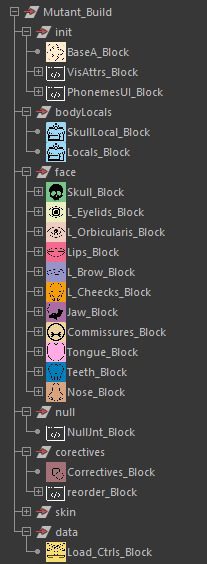

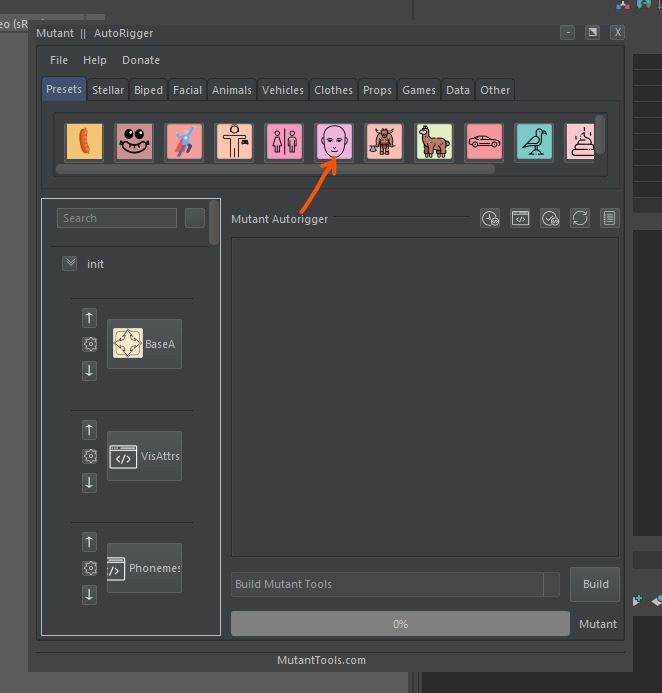

BaseA
Will create the base ctrl, and the rigs grouping system. Nothing to edit in this one.
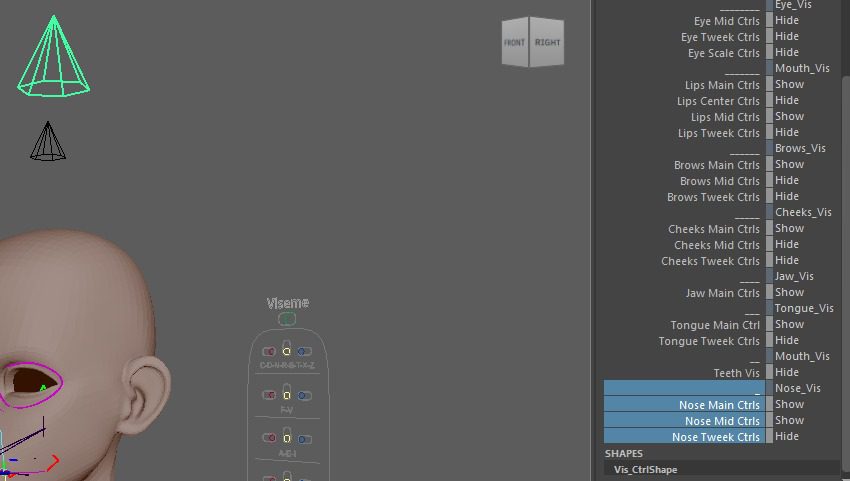
Vis Attrs
Will create a ctrl so we can store the visibility attributes for all the face rig


Phonemes UI
We don’t use this one much but will just create a UI so we can save the phonemes blend shapes when used.


Skull Locals
In this one we need to set the main head geometry name, just click the geo and set selection on the UI
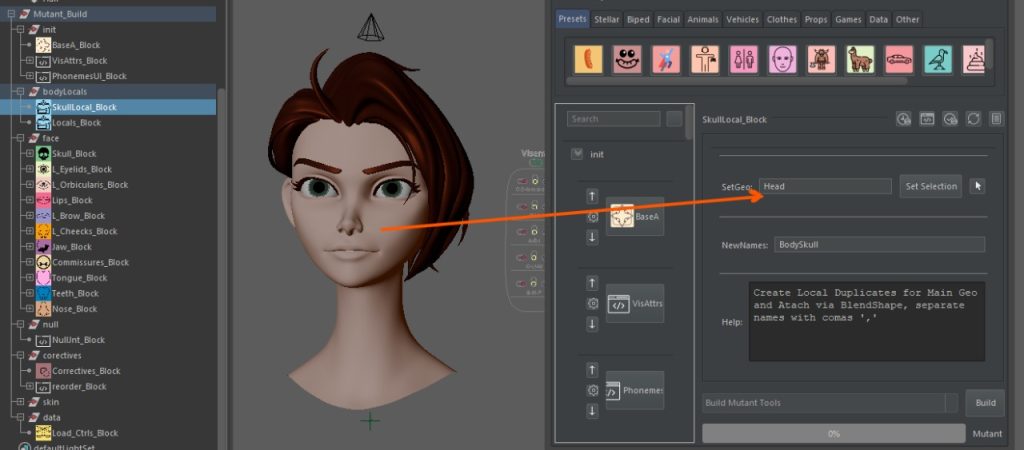

Locals
Wil generate as manny local systems as we want. Preset have the basic ones already set but if you need to add another layer just write in the new names field.


Skull
Will create 2 simple FK controllers and should be palced on the middle of the head.
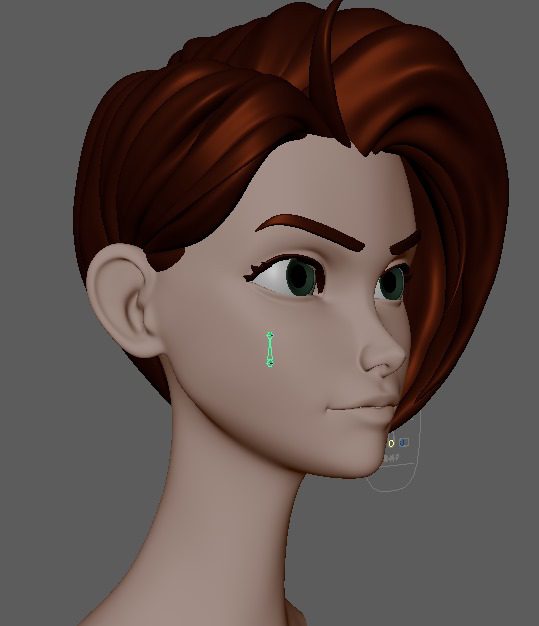

Eyelids
We need to place the pivot of the eye in the middle of the sphere so it can rotate around the eye. Select upper and lower eye edges and set them in the UI field.


Orbicularis
This is a wire system connected to the eyes local geo, We need to place it around the eyes, the idea is to be able to move the external part of the eyelids without affecting the eyes nor the brows.


Lips
The lips need to have an Upper and Lower edge selected and 2 guide placements. The Center guide is meant to be to be able to rotate the whole mouth around the teeth so have that in mind when placing it. The corner-orient guide is meant to be placed linearly going around the teeth. (Curvature of teeth is set in the commissures block.)
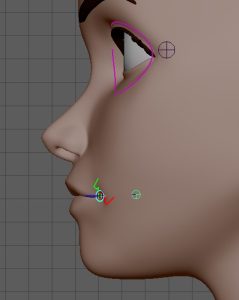


Brows
This one should be placed over the geometry and can be pushed inside a bit if needed to conserve a bit more of the ‘meat’. Always keep in mind the surface is normal and if you need a better following of the shape you can try the Borws advance block at your own risk but this seems to work fine 90% of the time.


Cheecks
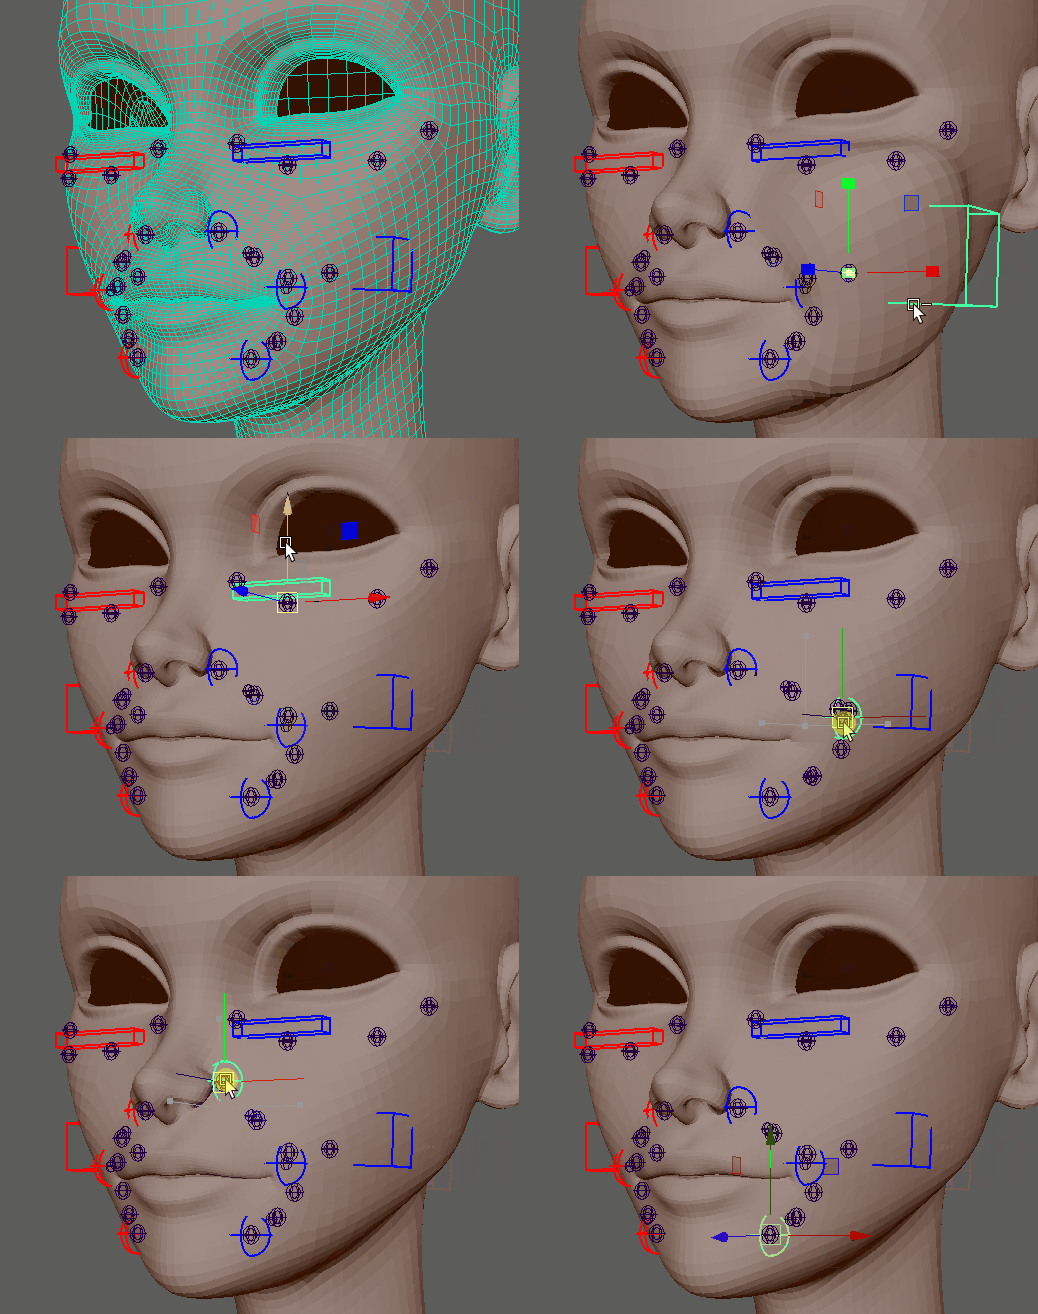
Cheeks is 3 guides. Nasolabial, Main Cheecks, and Cheeck Bone. You can play around with these after building and touching skin to make smiles and general expressions super fleshy and realistic. Try to place them at the topology level and then push them a bit inside so the movement comes from the muscles and not from the skin.


Jaw
The jaw has a colition System so try to put lower and upper lip joints close enough for it to feel like it’s touching. With the rebuildable workflow that Mutant Tools allows we don’t need to worry much about being perfect with the jaw at the beginning. We can place, try, replace, and retry as much as we need until the final pose is working. Only rule is to not rotate anything, only move.


Commisures
This block is the one I consider more important since is the one that fakes the roundness of the mouth. Place it in a good range! Don’t be afraid of going too back and around the face. Rules: Every curve starts at the same pos as the orient lip guide, all guides start at the same point, no funny business (if it moves down only in the Y axis, doesn’t mix up the axis.)
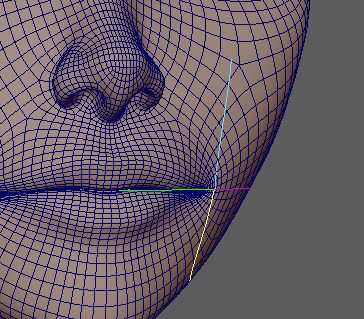


Tongue
Nothing fancy… just a tongue… The tongue is not a local rig but a global one.


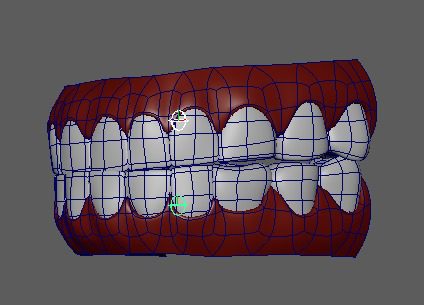
Teeth
Same as tongue… nothing fancy.. just ctrls with global rig.

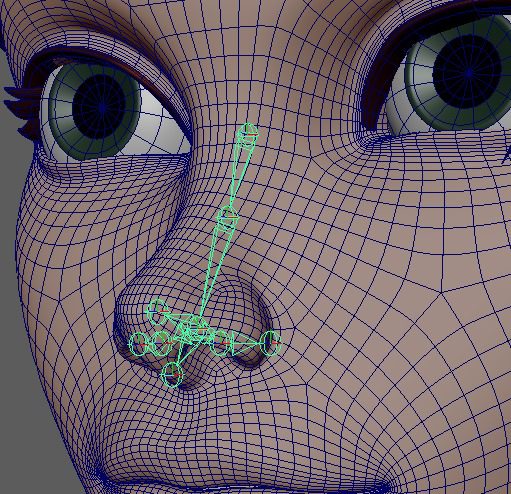
Nose
The nose is not that fancy is just FK chains so we just place it wherever we think is better again don’t worry too much since we can rebuild as many times as we need without losing data.

Null Joint
Will create a null joint for skinning the locals rigs.
					from maya import cmds
cmds.select(cl=True)
cmds.joint(n='Null_Local_Bnd')
cmds.parent('Null_Local_Bnd', 'Bind_Joints_Grp')
Correctives
Will create some base correctives nodes. We dont really use them but they are in the preset
Reorder
Will update the input orther to make work the correctives and the locals together
cmds.reorderDeformers('Correctives_BSP', 'Locals_BSP', 'BodySkull')
Skin Nodes
All these skin nodes will select the local geo, the null and the specific system bind joints to create the base skinning so we know which bones are in which systems faster without the need of looking in the outliner. Skinning helpers will come in handy later.
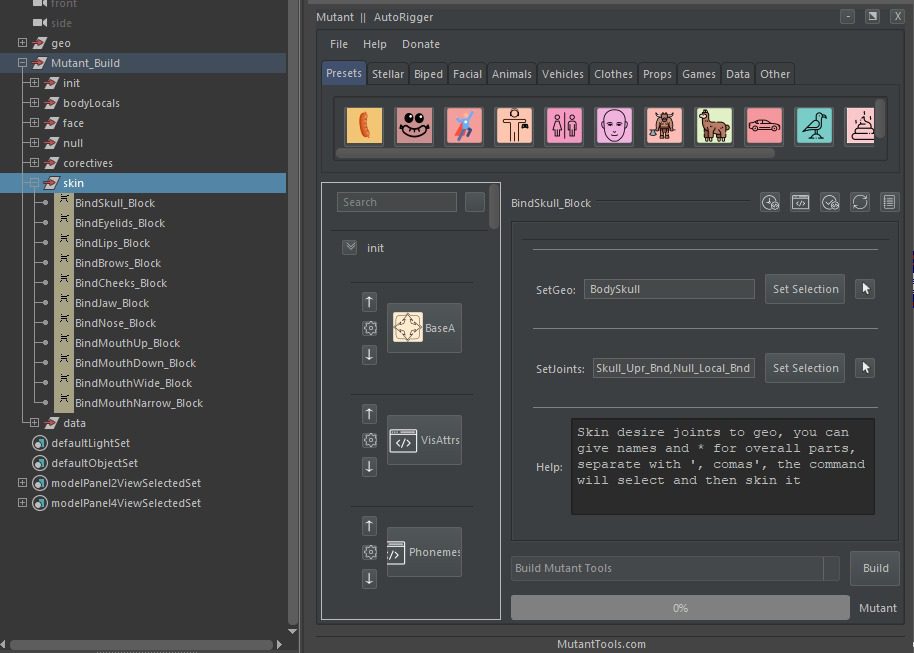

Load Ctrls
Will load the ctrls preset. If you want to start with the base ones and update to your own just delete this block
Guides Complete
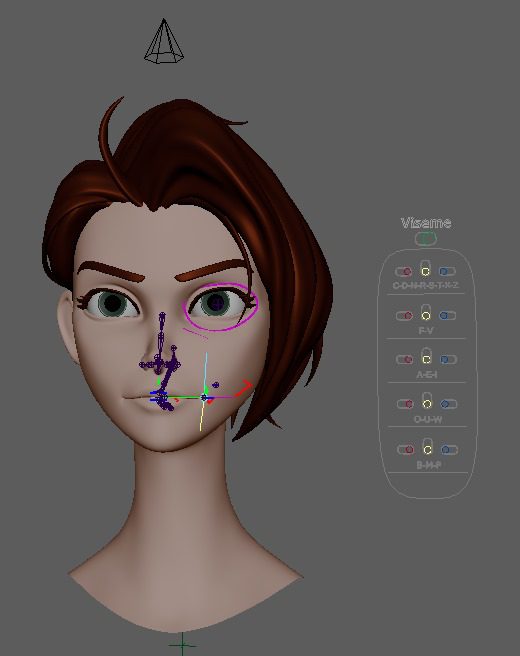

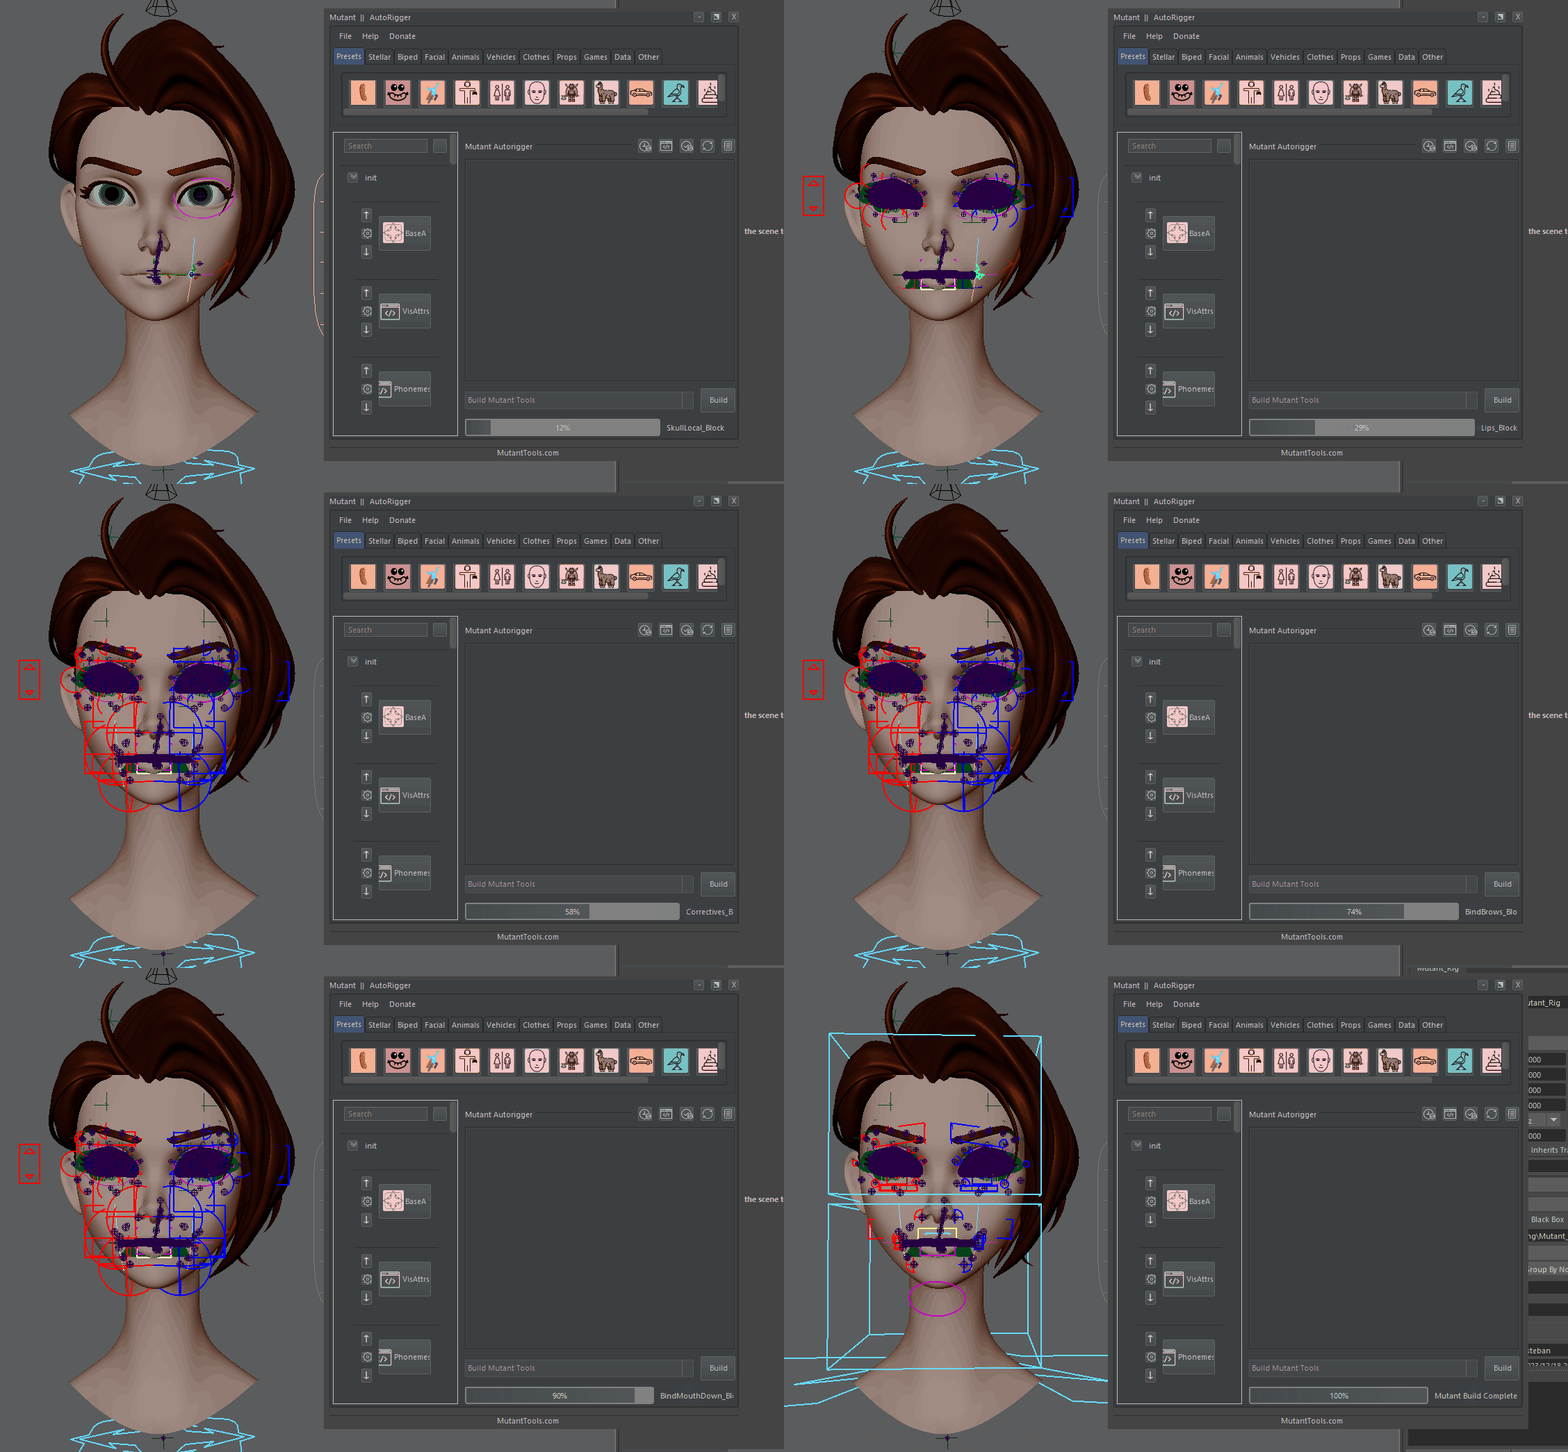
Building and understanding the setup.
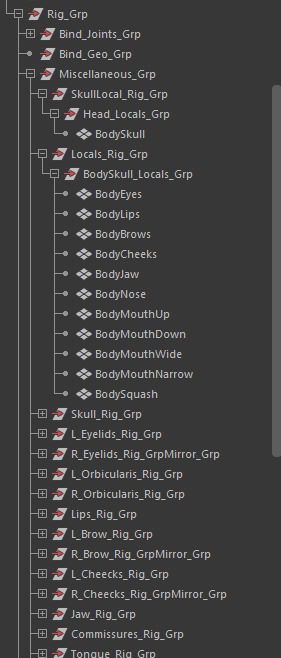
Outliner Groups
geo > Geommetry
Mutant Build > Template Guides
Mutant Tools Grp > Main rig setup, dont change anything pls.
Skull Parent Loc > Moves the ctrls around only since it ment to be a local system, we connect this to main head crtl on body on the face install stage, using face install tools.


On the Rig Grp we have everything… don’t touch anything… You just need to know what geometries we need. We need the BodySkull and the BodyEyes, BodyLips, etc… You can find them here but it’s easy to use the Helpers UI
You also get some set where you can find which bones to skin to each geo in case you need to add some extra geos. Again wait for the UI, it’s just easier



Helpers UI
					import sys
import os
from maya import cmds
mutant_path = 'C://Users//Esteban//Documents//maya//2022//scripts//rigging' #your folder math
if mutant_path not in sys.path:
    sys.path.append(mutant_path)

import Mutant_Tools.UI

try:
    import importlib;from importlib import reload
except:
    import imp;from imp import reload

import Mutant_Tools
from Mutant_Tools.UI.Helpers import load_helpers
reload(load_helpers)

try:cHelperUI.close()
except:pass
cHelperUI = load_helpers.HelperUI()
cHelperUI.show()
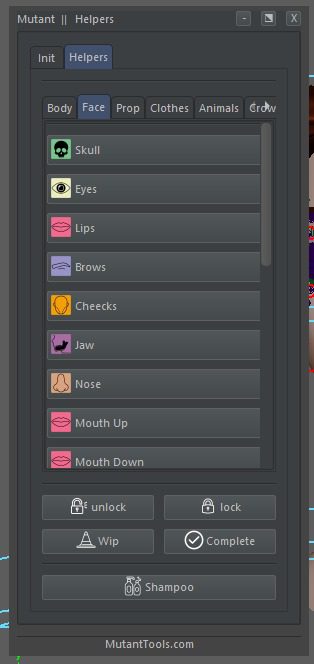
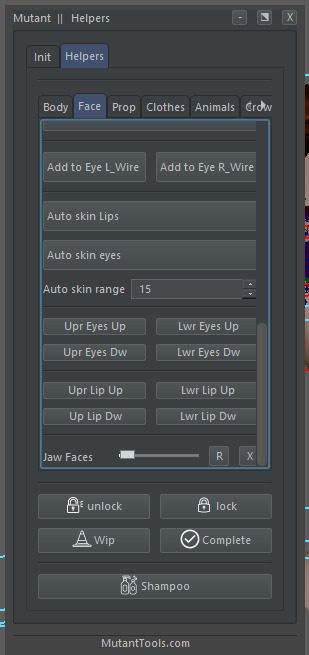
These tools came with the main Mutant Tools license and are the day-to-day on the riggers. You can open it either with this code or in the rigging menu. Go to the Face tab and make your life easy by following the next tip.


Skinning
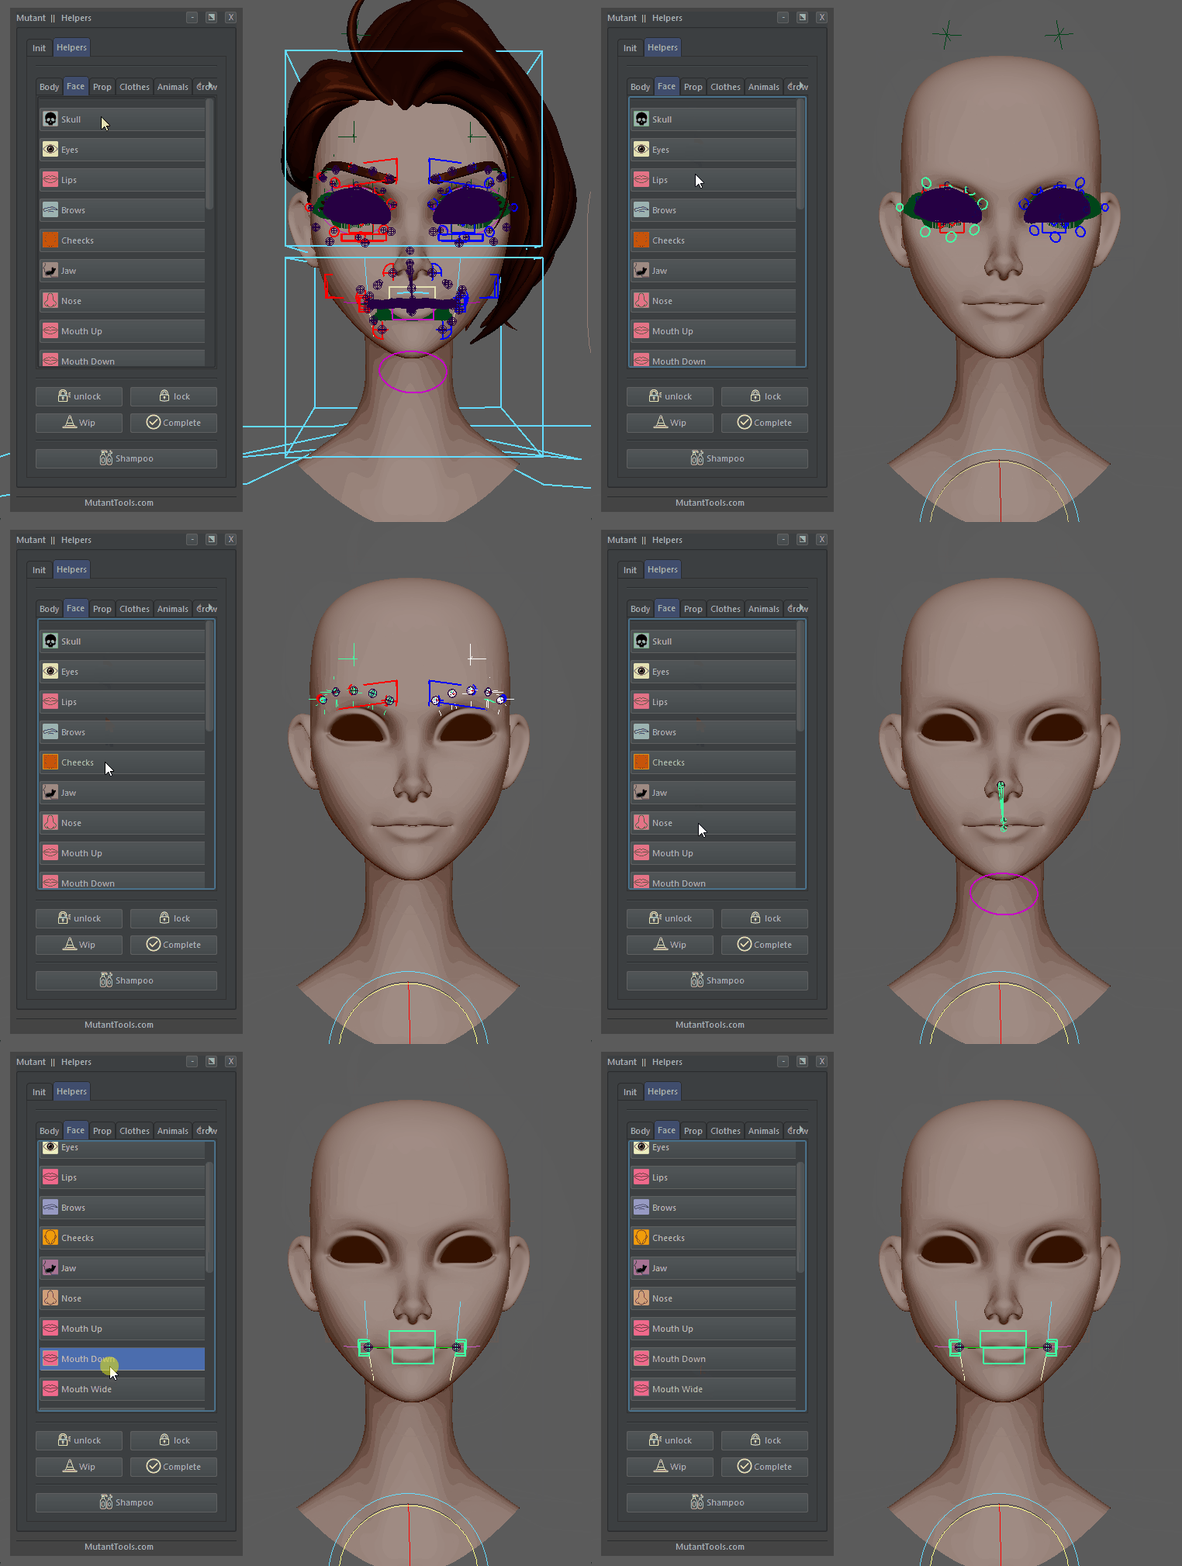
For this part I’ll try and show the tips and tricks we have found for easy skinning of each part. Some are more automated than others. On the helpers Ui you can choose which part to work on for easy access to the geos, joints, and controllers.
Save and load Skinning
At any point you can save and load custom skins using the main UI


Skull Skin
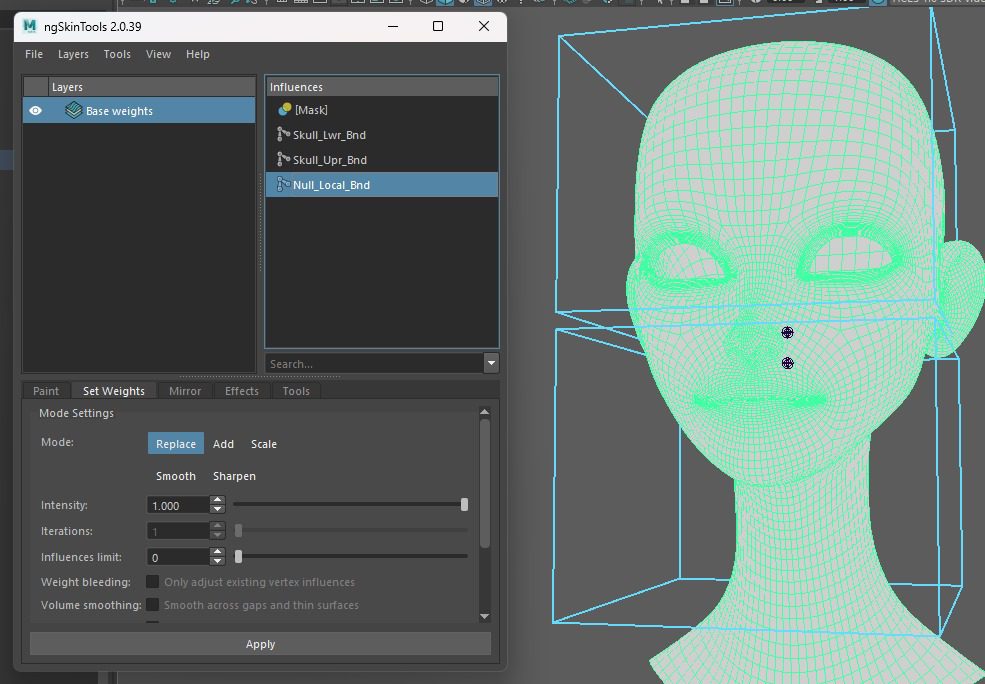
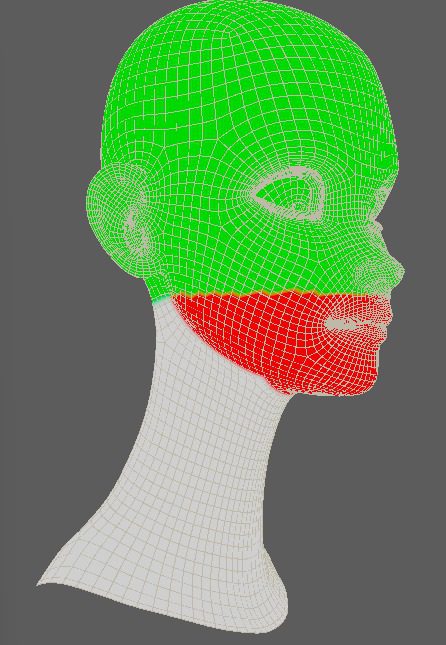
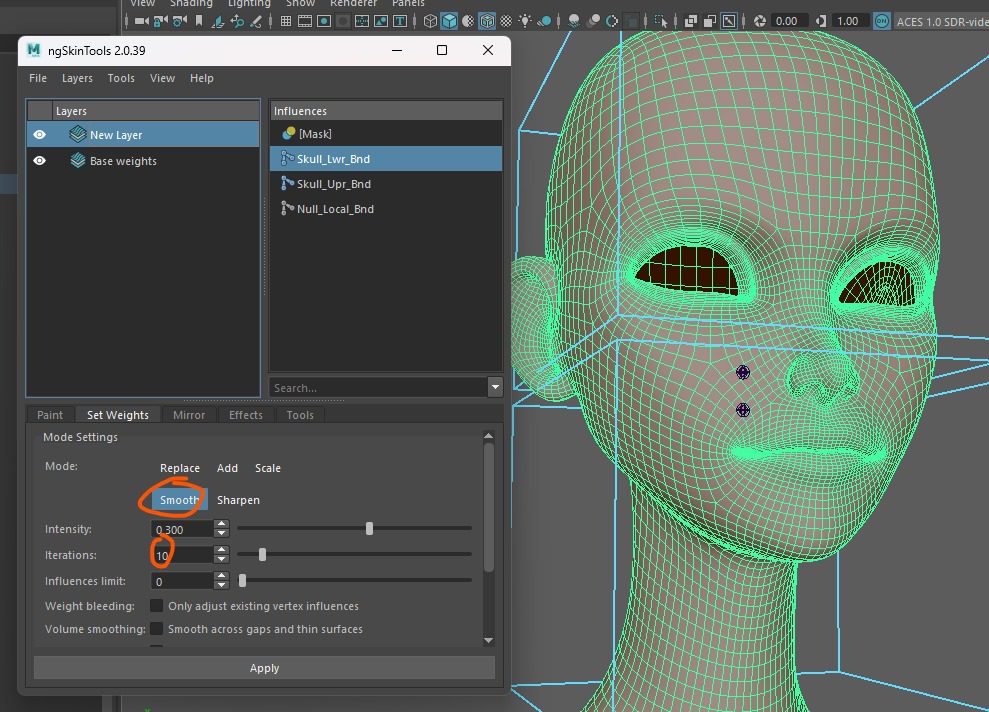
Null joint controls the body and neck. Up Skull controls nose and up. Down controls mouth Down. Nothing Fancy here but I’ll show the basics of ng to use in the next parts.
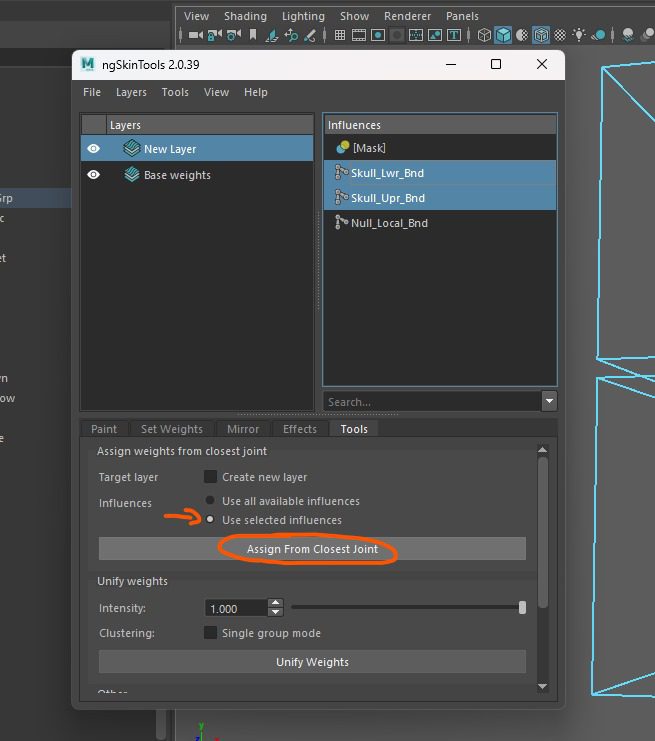
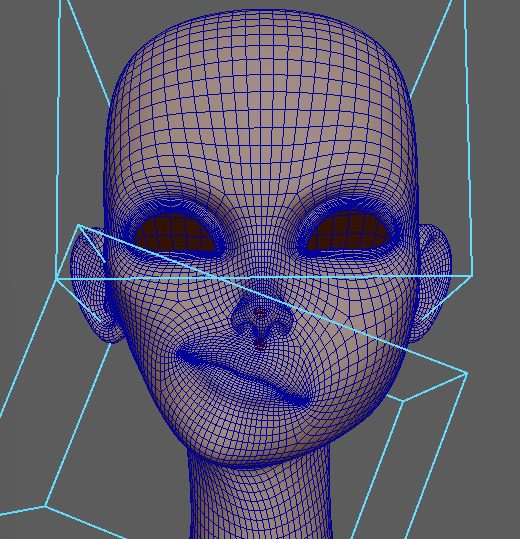
First start assigning everything to the skull joint, then create a new layer select the body parts you need, and assign from the closest influence. Adjust the skin a bit to be hard and then smooth a couple of times. Test the controllers to look something like the images.






Eyes Skin
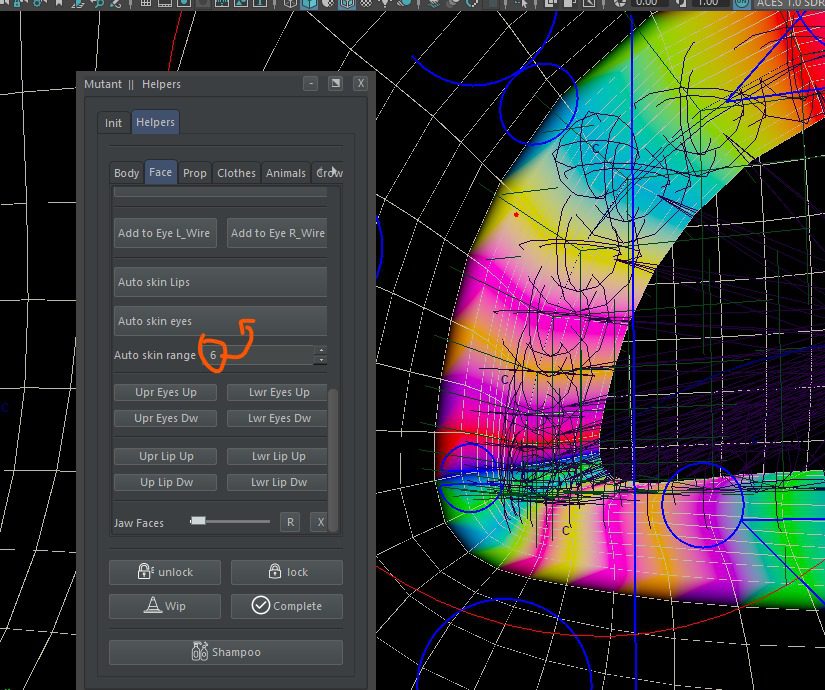
For the eyes, we have an auto skinning that helps a lot. It was developed with the help of Cesar Gallo and Luis Motta.
Set the range from the loop to the end of the eye area and click auto skin eyes, in this case, 6 works. Then smooth only the edges and test how the eyes close.
Skin cluster most likely needs to be Dual Quaternion to be able to wrap around the eyeball




Eyes Wires
We have some wires in the eyes, so don’t forget to paint those. The wires work when the Eyelids Up Slide is off. When on will use the skin for the secondary controllers, in this rig ill use slide-on.
Also, the orbicularis have wires for additional movement. Also needs painting.


Lips Skin
Same as the eyes: set range, auto skin, smooth done!
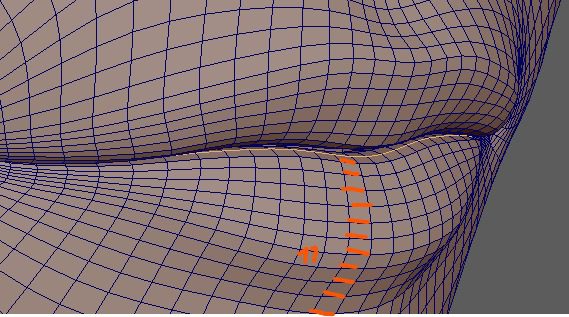
the Mouth controlelrs we skin are the secundary ones, main corners ones are skinned in the comisures step + some custom shapes later on the pipe.


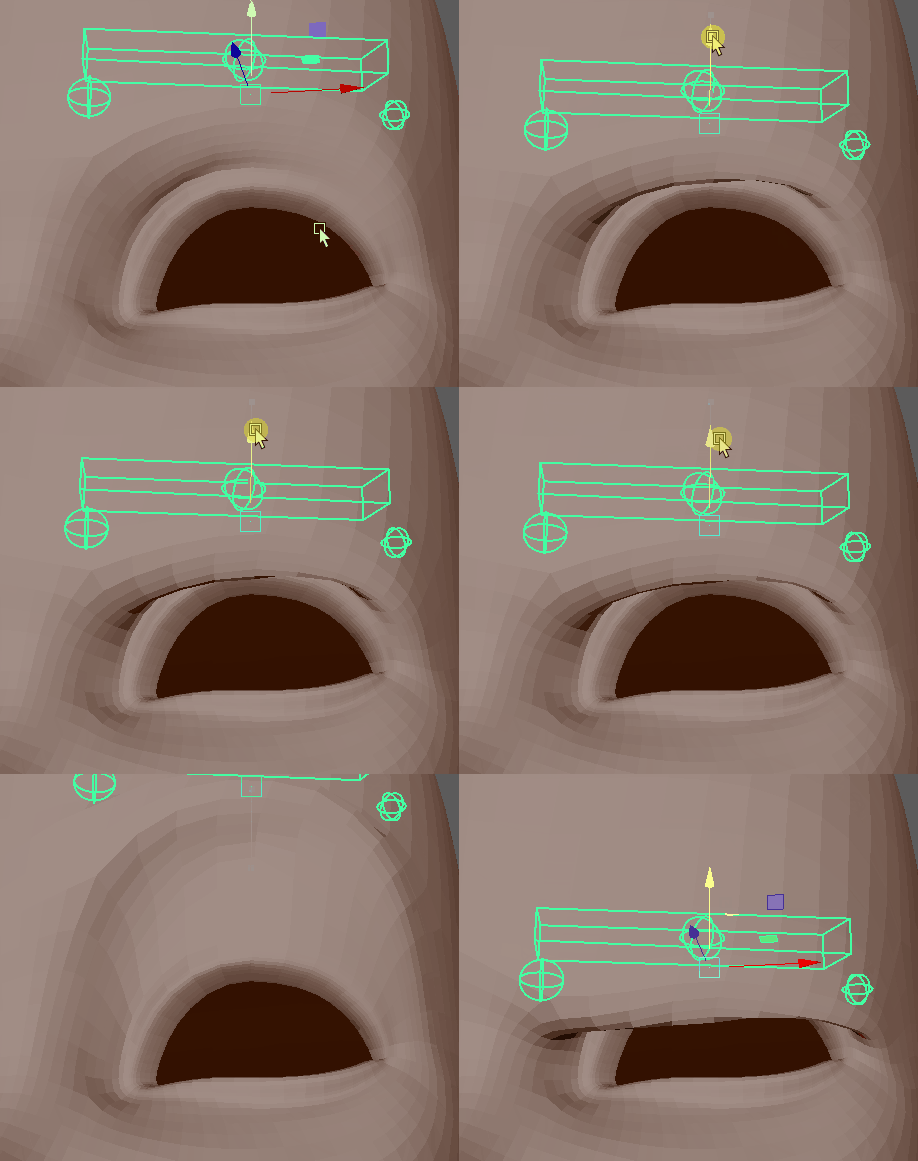
Brows Skin
Skin Hard, grab all the front, and then extend to the lower upper skin part of the eyelids to grab more meat. We want this kind of movement as a base and later add correctives to make it more linear and perfect.


Cheecks Skin
I like to start heavy and end super soft since I mostly use them as flesh add-ons and not really to make any specific shapes.


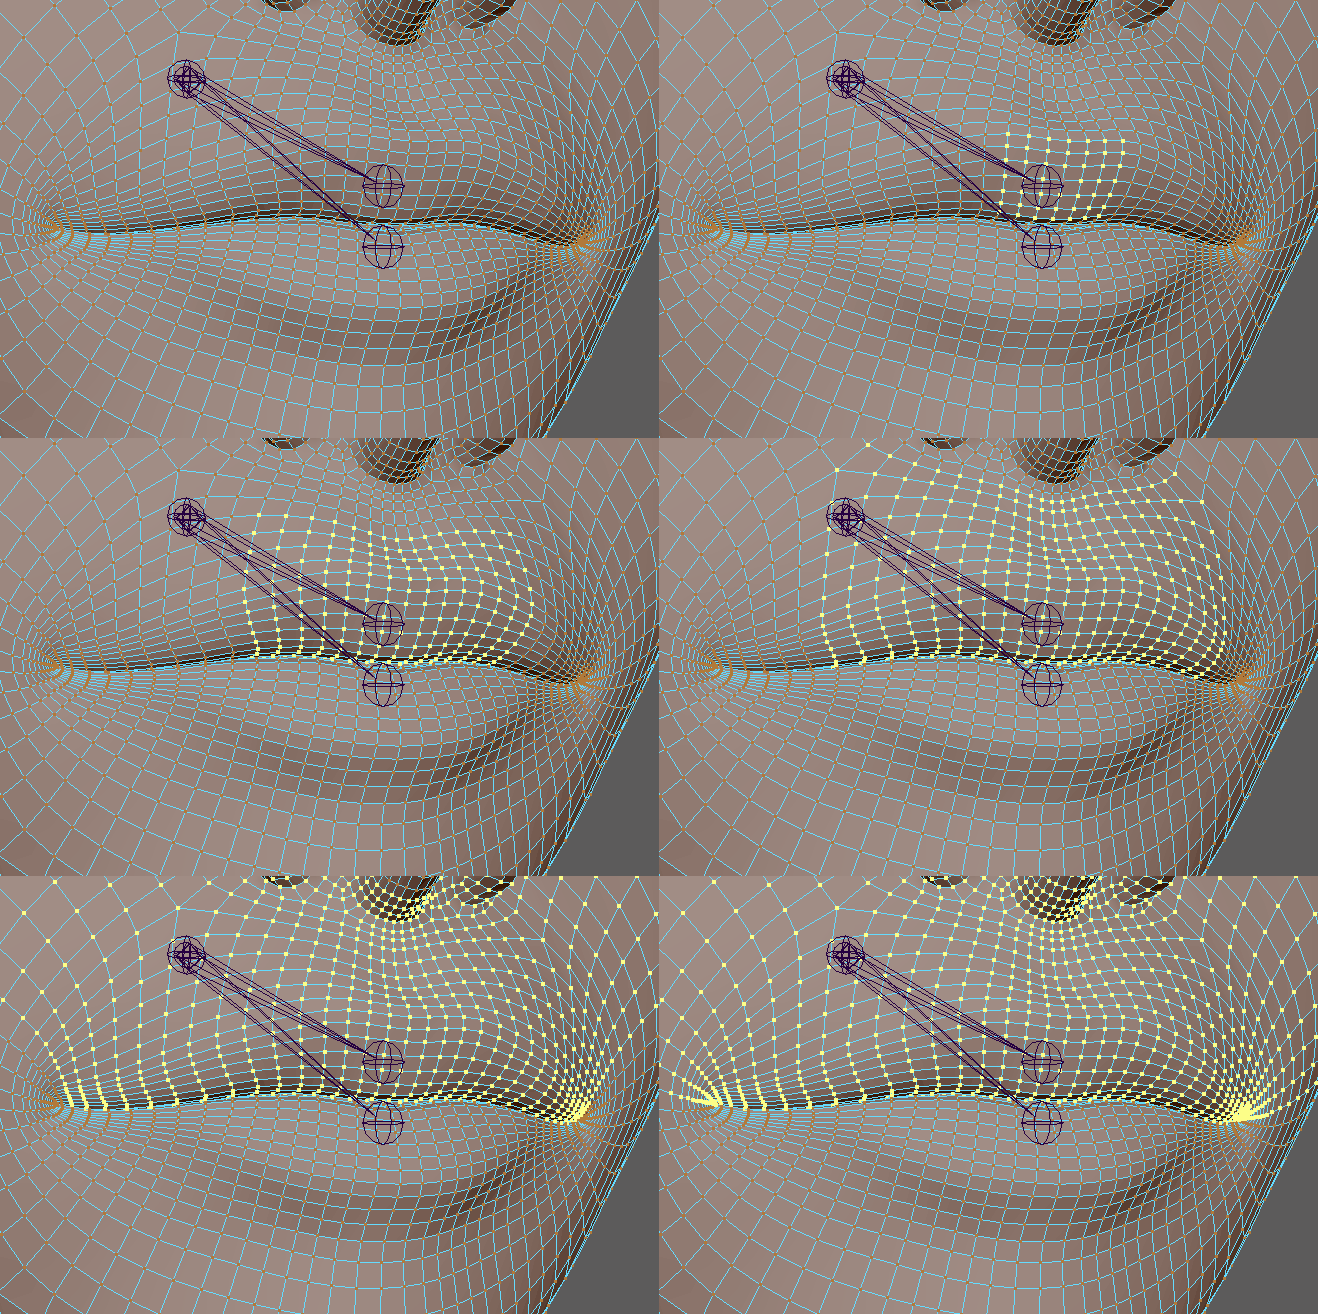
Jaw Skin
Select vertex in the middle of lip and then grow selection, Then bind to 1 in the specific joint and then smooth like crazy until you get the ball shape for when the mout is open


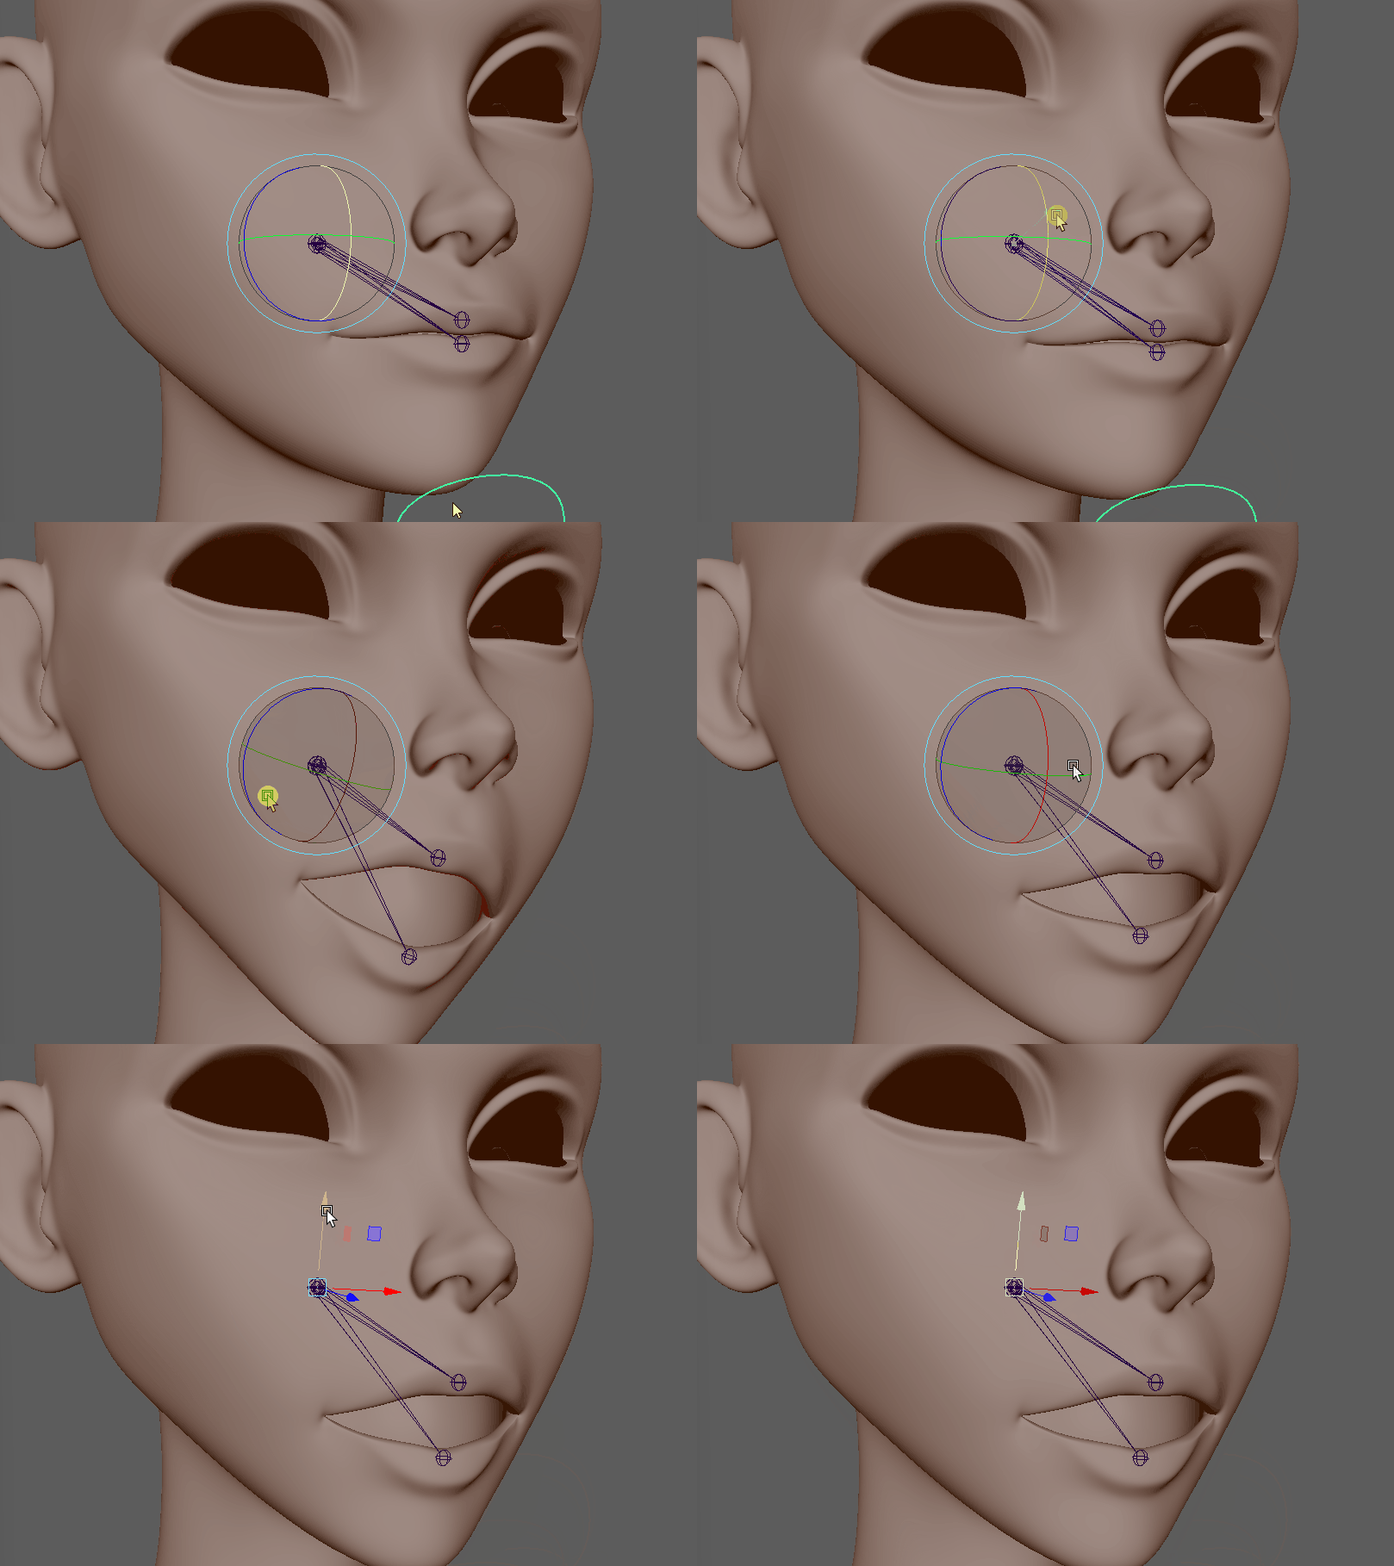
Nose Skin
Just Hard FK with smooth… Nothing fancy here.
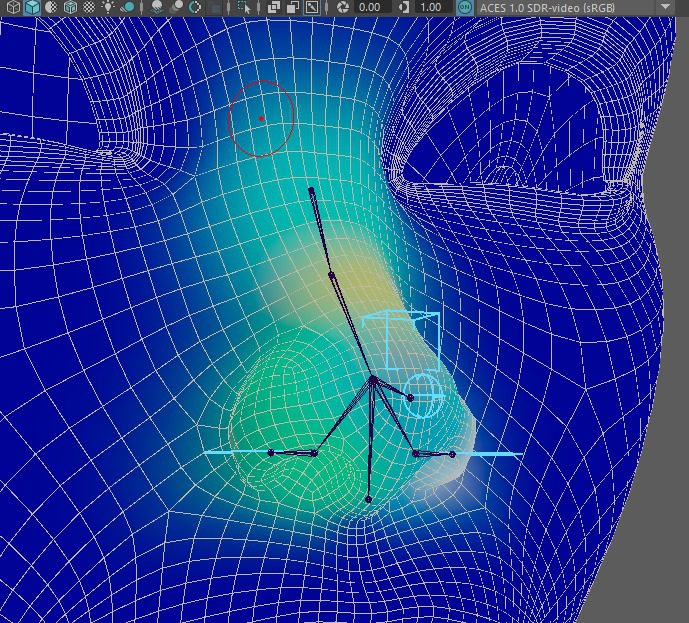

Mouth Up, Dw, Wide Narrow Skin
We can do one and copy-paste the skinning using either Ng or Maya native tools to the other heads.
Select the corner vertex with soft selection on adjust the radius and then assign the skin with ng to bind it. Make you you have a great base so the blendshapes are going to be easier to create.


Fixing Some Guides Mistakes
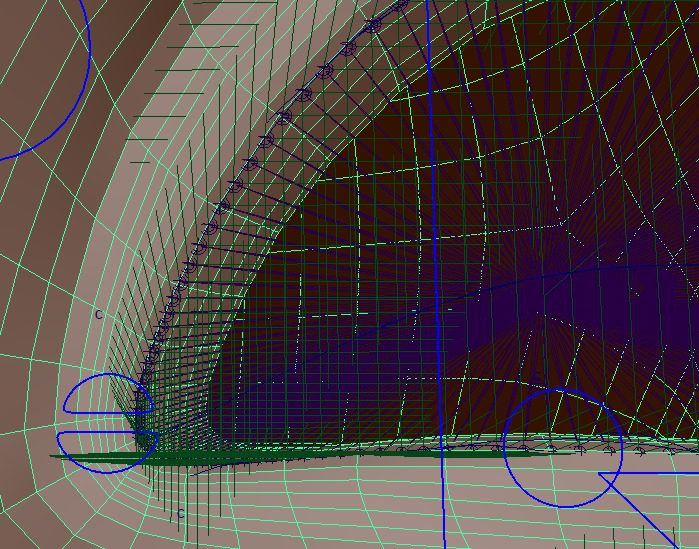
Rebuilding the eyes
I Built the eyes while the preview mesh was on (3 on the keyboard) and it makes more vertex, so I just need to turn it off (press 1) and rebuild. The rebuild will save the ctrl shapes and the skinning, then delete everything, build again, and load all the components back. The eyes idea is to have one joint per vertex for the autoskin to work.
In this case, since geometry is changing loading skins doesn’t work so manually saving them and then loading them works for the rest of the already finished skins.


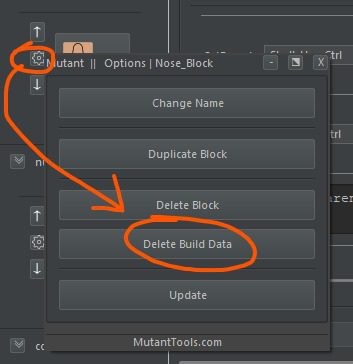
Rebuilding the Nose
I found this issue at the end and so what I did was. Delete vis attributes, delete build data, select nose block, and build selected. Just rebuild that node with the guides well placed.



Blendshapes
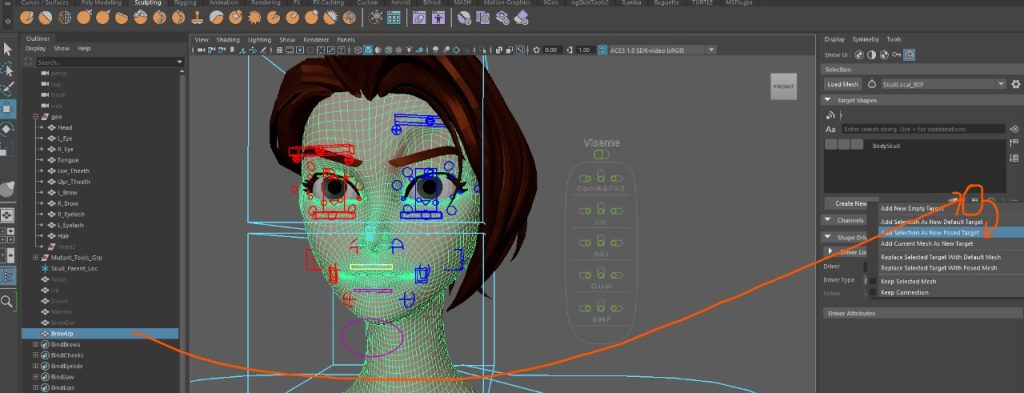
Sculpt your blend shapes as well as you can, and try to get references from the real world or animated films if they are stylized. Now we will create the connections using Brave Rabbit Shapes.


Create from posed target



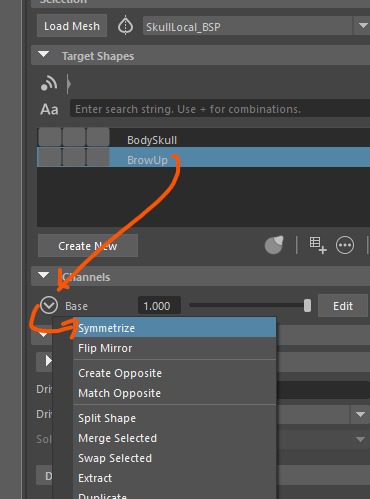
Mirror
Lorem ipsum dolor sit amet, consectetur adipiscing elit. Ut elit tellus, luctus nec ullamcorper mattis, pulvinar dapibus leo.

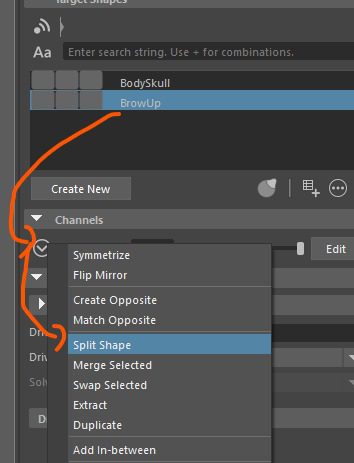
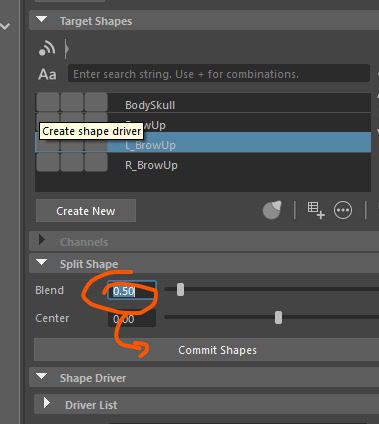
Split


Connect to Rig


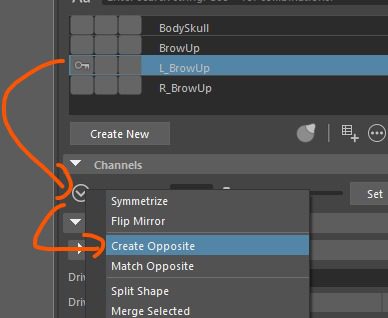
Mirror Connections


Done 🙂
